
- After successfully installing r7viewer The r7viewer app icon appears as shown in the picture.

- Double-click the r7viewer.exe app icon to open the app (or right-click the app and select Open).


| Registered viewer email account. | |
| Password | Registered password. |
| Options | Supports function customization. |
| Connect | Sign in to your account. |
| Save password | Save Password. |
| Forgot password? | Go to the password reset page. |
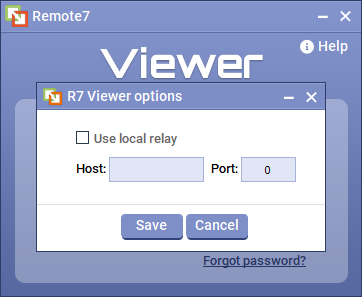
- Select Use local relay Used for devices connected via the r7relay app.
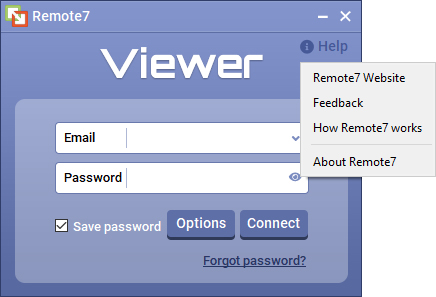
| Remote7 Website | Take users to the remote7.com homepage. |
| Feedback | Take users to the customer feedback page. |
| How Remote7 works | Take users to the user manual page. |
| About Remote7 | Take users to the introduction page about the Remote7 program. |
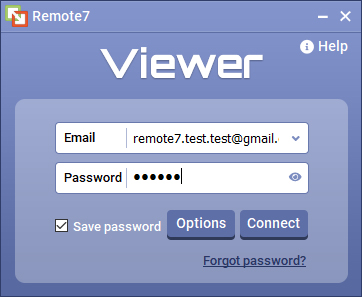
- When connecting to the remote machine, enter the email and password registered in the r7viewer interface. Then press the Connect button to display the remote server list.
- After connected successfully, the PC list is displayed as shown.
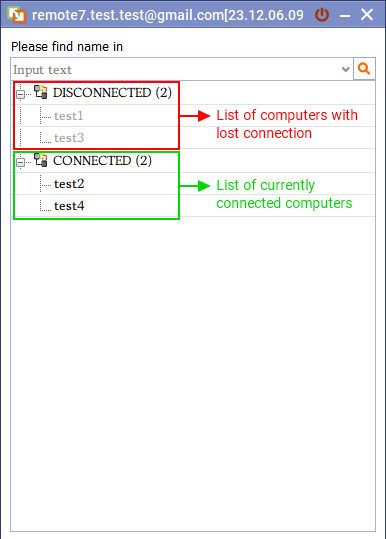
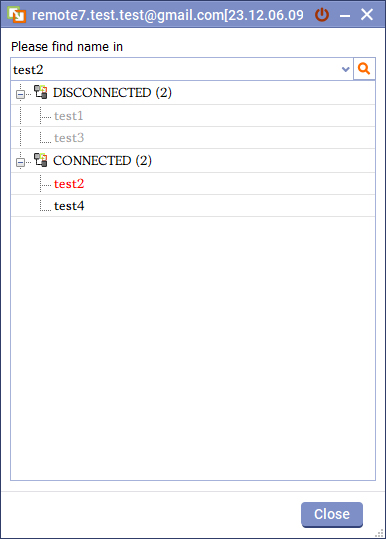
- Enter the name of the PC you want to search for in the "Input text" box then select the magnifying glass icon or press the Enter key the PC you want to search will be highlighted in red.
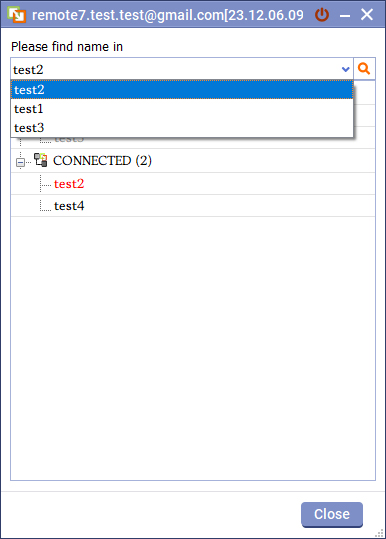
- Click the Dropdown arrow Display all previously searched PC names.
- Right-click on the Pc name in PC list to display functions of Pc Server.
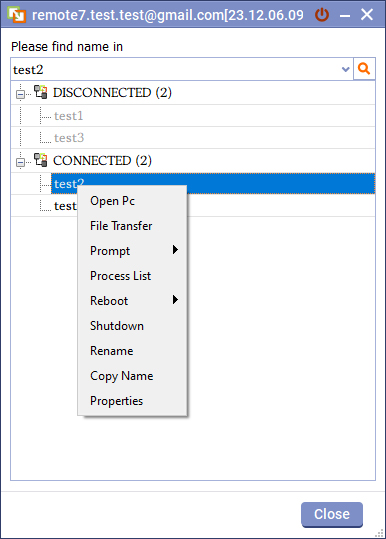
| Open Pc | Open a connection to the selected PC Server. | |
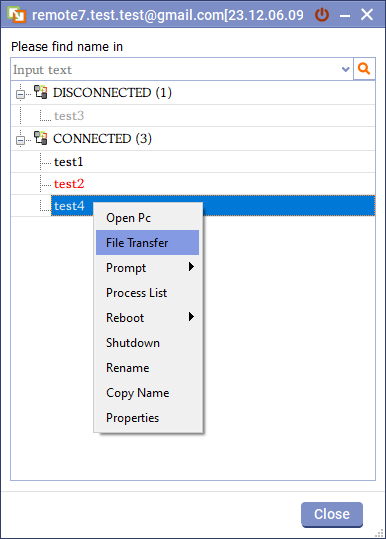
| File Transfer | Open the File Transfer/receive window with Pc Server. | |
| Prompt | Command Prompt | Display the Command Prompt window on the Pc Viewer screen. |
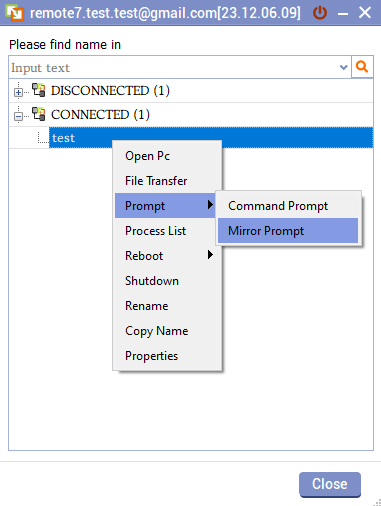
| Mirror Prompt | Display the Command Prompt window on the Pc Viewer screen and Pc Server screen. | |
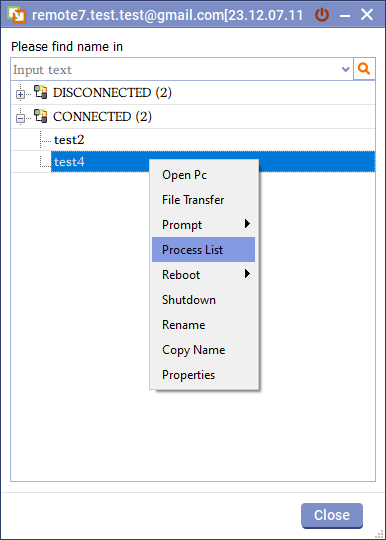
| Process List | Open the Task Manager window of the PC Server. | |
| Reboot | ||
| Restart Remote7 | Restart the Pc of Server r7server. | |
| Reboot Pc | Restart the PC Server. | |
| Shutdown | Power off the PC Server. | |
| Rename | Change Pc Server name. | |
| Copy name | Copy Pc Server name. | |
| Properties | Displays the information panel of the PC Server. | |
- Select a Pc Server in PC list, right-click and select Open Pc or double click on the Pc Server name.
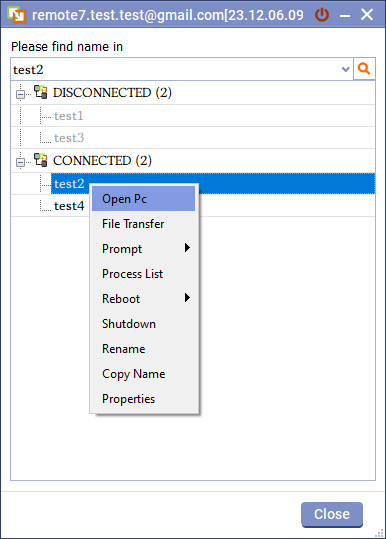
- After successfully connected to the Pc Server, the Viewer screen will be displayed.

- Functions of the Toolbar.

 |
File Transfer: Open the File Transfer/receive window with Pc Server. |
 |
Paint: Draw images on the Viewer screen. |
 |
Reboot: Restart PC Server. |
 |
Windows Key: Display the start menu window of the Viewer screen. |
 |
Refresh: Refresh the Viewer screen if the connection is slow. |
 |
Command Prompt: Display the Command Prompt window on the Pc Viewer screen. |
 |
Default Display: The Viewer screen displays as its original size. |
 |
Monitor: This mode appears when the Pc Server has multiple monitors. Used to switch back and forth between screens. |
 |
Color: Change Viewer screen display to another color mode. |
- Click Paint on the Toolbar, the Viewer screen displays as shown.

| Color | Change the display color when drawing on the Viewer screen. |
| Size | Change the drawing size on the Viewer screen. |
| Tools | Change the stroke to round, square, straight or text. |
| Undo | Return to the Tool step you just performed on the Viewer screen. |
| Eraser | Delete all drawings on the Viewer screen. |
- Click Windows Key on the Toolbar, the Viewer screen displays as shown.


- Viewer screen when minimized.

- After clicking Use Default Display on the Toolbar, the Viewer Screen returns to its original size.
- Click Monitor on the Toolbar, the Viewer screen displays as shown.

- Users can choose to switch back and forth between screens or open both screens at the same time.

- Click Color on the Toolbar, the Viewer screen displays as shown. Users can choose to change the Viewer screen display to a different color mode.

- Send File/Folder by dragging and dropping: Users can conveniently send File/Folder by dragging File/Folder from the viewer and dropping it anywhere on the server through the viewer screen File/ The folder will be sent quickly and conveniently.

- Send/Receive File/Folder/Document by Copy-Paste: Users can send File/Folder/Document using the key combination Ctrl C to copy and Ctrl V to paste from viewer to server and vice versa to receive from server to viewer.

- Select a Pc Server in the PC list, right click and select File Transfer.
- Display the File Transfer window after successfully connected to Pc Server.
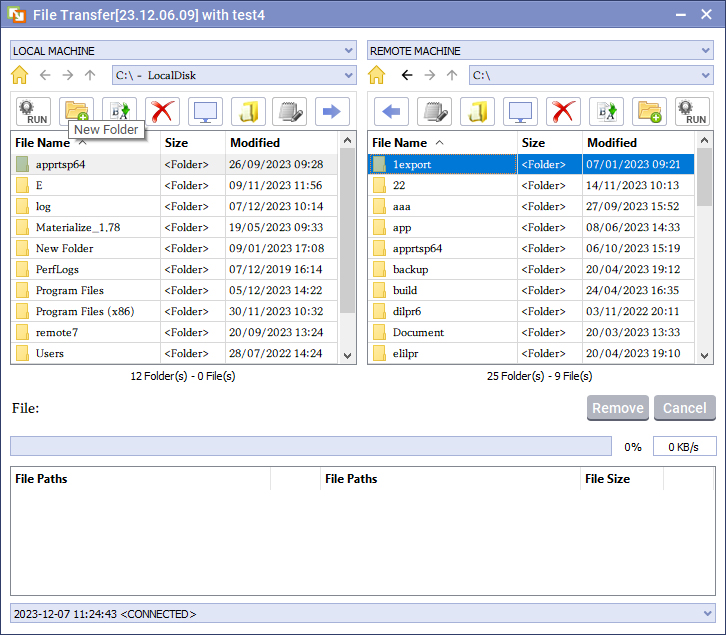
- Functions of File Transfer tool bar.

 |
Open the selected file. |
 |
Create a new folder in the selected folder. |
 |
Change the name of the selected file or folder. |
 |
Delete the selected file or folder. |
 |
Quickly move to the Desktop folder. |
 |
Quickly move to the My Document folder. |
 |
Edit text file. |
 |
Send selected files or folders via Server. |
 |
Send selected files or folders from the Server to the Viewer. |
| Status | Displays the sending/download percentage of File/Folder from Viewer to Server or from Server to Viewer. |
| Speed | Displays the transfer speed of File/Folder. |
| Remove | Remove Files/Folders that do not need to be sent/downloaded in the send/download list. |
| Cancel | Cancel the entire process of sending/downloading File/Folder. |
| Envent Log | Record status events of the File/Folder sending/downloading process. |
- Users can transmit/receive multiple files/folders at the same time with fast transmission speed.
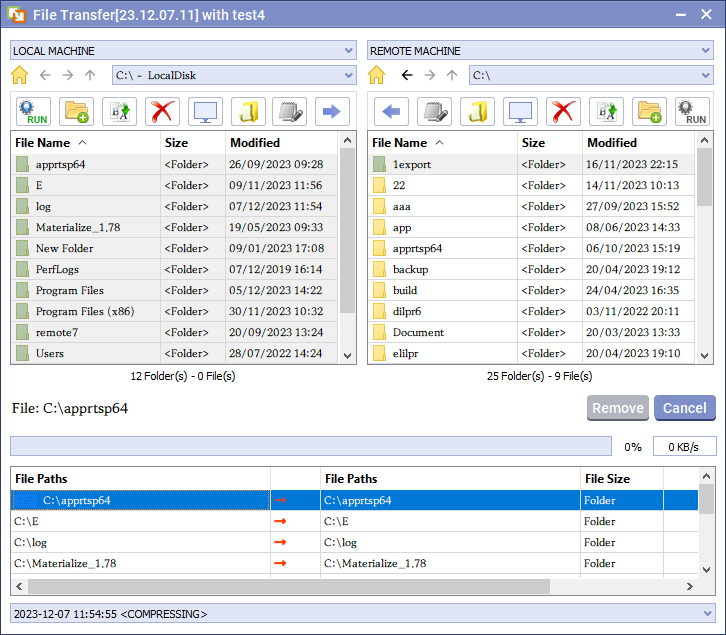
- Select a Pc Server in the PC list, right click then select Prompt then select Command Prompt.
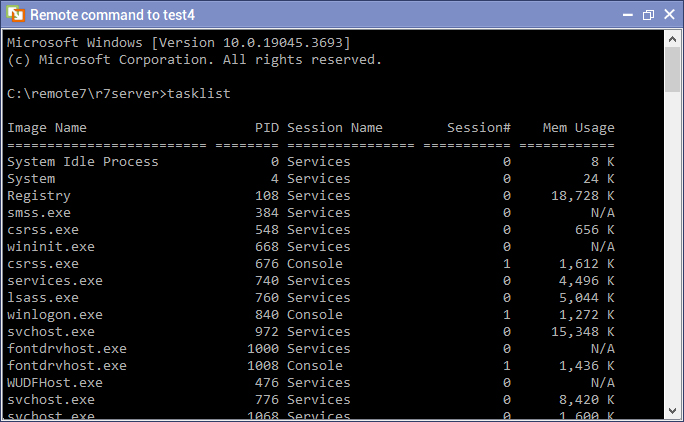
- Display the Command Prompt window after successfully connected to Pc Server.
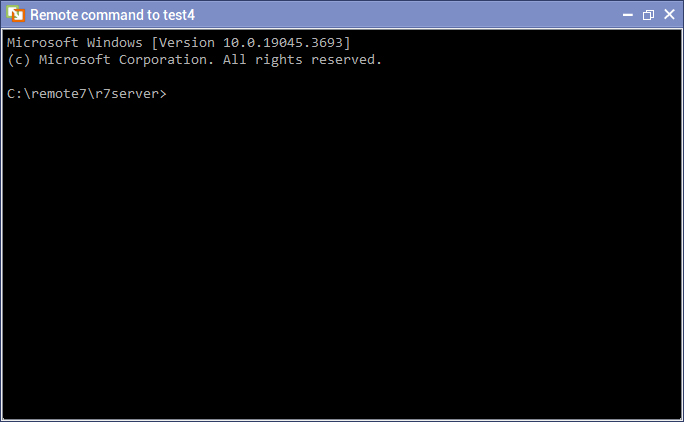
- Users can type any command like Windows Command Prompt.
- Select a Pc Server in the PC list, right click then Select Prompt then Select Mirror Prompt.
- Display the Command Prompt window on the Pc Viewer screen and Pc Server screen. Users can type commands back and forth between the Viewer and Server.

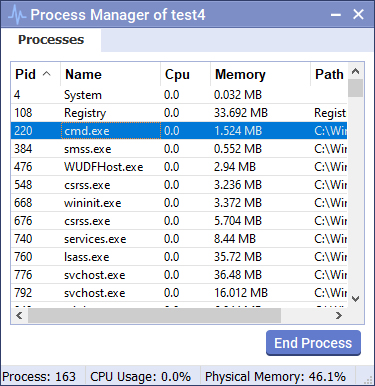
- Select a Pc Server in the PC list, right click and select Process List.
- Display the Process List window like Task Manager after successfully connected to Pc Server.
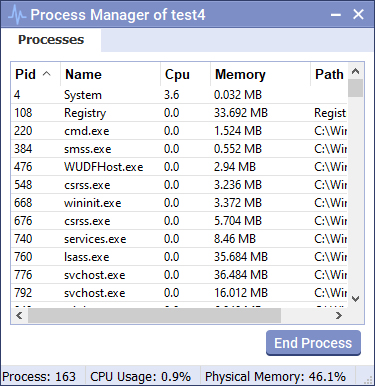
- Select a program running in Process List and then select End Process to turn off the program running in Pc Server.
Company name: Elisoft Co., Ltd.
Representative name: Kim Kyung Lok
Business registration number: 502-81-81890
E-commerce registration number: 2016-Gyeongbuk Kyungsan-0079
Headquarters address: (38408) 17 Jijisaneop 4-ro 1-gil, Hayang-eup, Gyeongsan-si, Gyeongsangbuk-do
TEL: 053-857-5548 / FAX: 053-857-5549
Seoul Office: (06642) 3rd floor, Green Tower, 127 Seochojungang-ro 8-gil, Seocho-gu, Seoul
TEL: 02-419-5396 / FAX: 02-419-5397
Research Institute: (42250) 32, Alpha City 1-ro 31-gil, Suseong-gu, Daegu
Tel: 053-857-5548 / Fax: 070-5014-5444